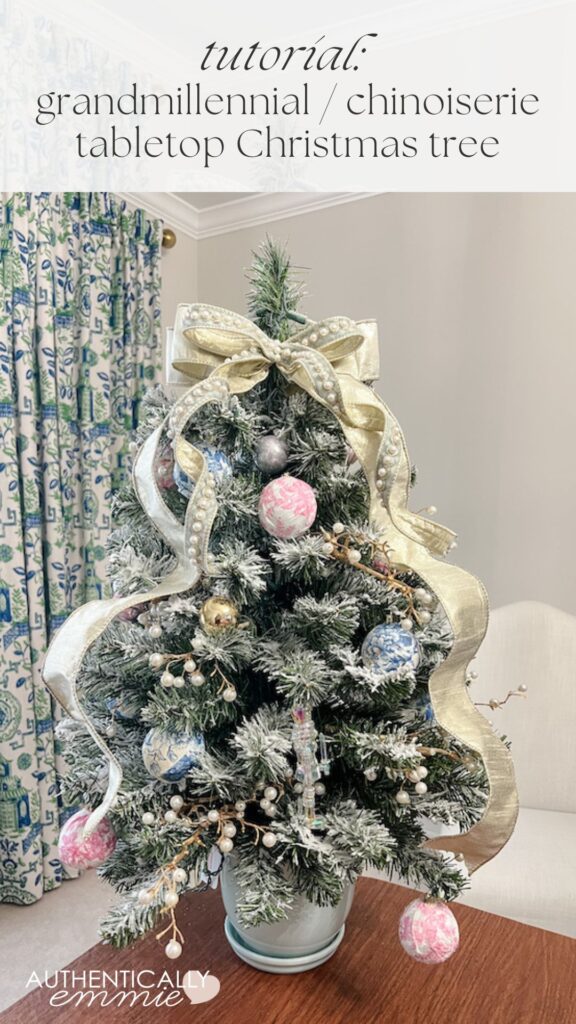
A mini tutorial for a tabletop Christmas tree in the grandmillennial or chinoiserie style.
Disclosure: This post contains affiliate links. This means I earn a small commission on anything you purchase when you click that link. Thank you for helping support this work!

This year for Festival of trees and lights To benefit the Norton Children’s Hospital Foundation, I decided to decorate a 30″ wreath, a 36″ wreath, and a 3 foot tree. When thinking about what to do in terms of the design of the small tree, I was trying to think of something a little different than the traditional red and green, that could be placed as part of a table or buffet. I have a full-size grandmillennial/chinoiserie tree that matches the colors of my dining room, and people seem to really like it, so I decided it would be a fun challenge to create something similar on a smaller scale.

The first thing was to find a base for the tree. I wanted to use some type of porcelain or ceramic vessel instead of the traditional skirted tree. I would have loved to use a vintage planter or something similar, but short of that, I found a sweet light blue ceramic pot from Home Depot.

To mount the tree in the pot, I trimmed it. floral foam and piled it up to the top of the pot. I then used a ruler to find the center of the foam and then inserted a small wooden dowel (smaller diameter than the actual tree post) directly into the center of the foam. When it was time to assemble it, I put hot glue in the hole and then pushed the tree in. I covered it with more hot glue.

The tree supplied was green and I thought having a flocked tree might stand out from the crowd. So I tried a product that was surprisingly easy to use. SnoFlock. I suggest doing this process outside if possible, but it was fine inside with all surrounding surfaces covered.

For decorations: I couldn’t find any chinoiserie-specific decorations that weren’t cost-prohibitive, so I made some by placing napkins on top of unbreakable decorations. I also made these for my full size tree and they have held up for a few years. (My friend Monica has a great tutorial on your blog.) I also added some iridescent nutcracker ornaments and unbreakable mini balls.

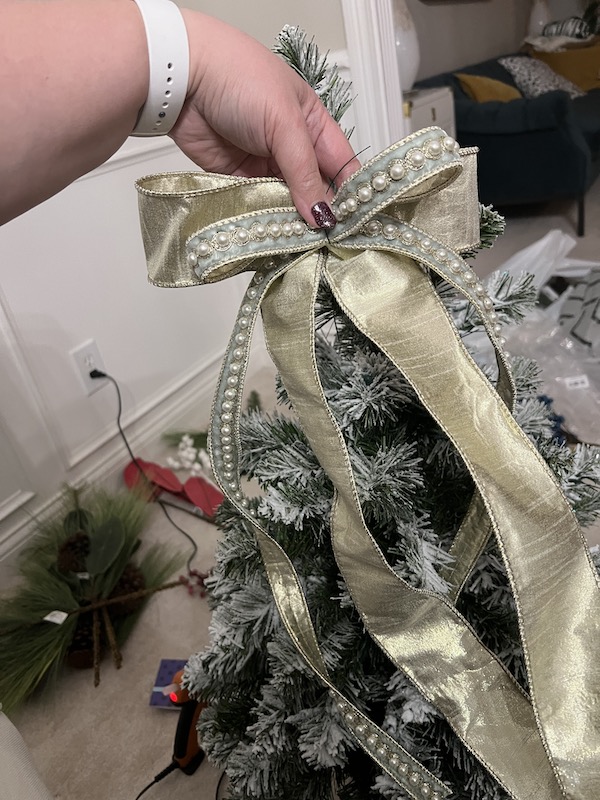
I wanted the ribbon to be the star of the show, so I found a gorgeous ribbon from Farrisilk. If you’ve never used their tape before, you’re in for a treat. It’s available at specialty stores, but I bought mine at some Etsy stores. This 1″ wide light blue velvet with artificial pearls It was expensive, but so unique. The platinum ribbon is 2.5″ wide. It’s sold out, but this is similar and also from Farrisilk.
I didn’t want the tree to be limited to one side, so I made a total of 2 bows (each bow with both types of ribbon) and placed one on each side.

Finally, to add a little more glamour, I added some faux pearl stems. I had these giant pearl stems from a previous project, so I cut them into segments with wire cutters and then connected them to the branches of the tree. Here are some similar stems.

He Festival of trees and lights is Nov. 10-12, 2023 at Louisville Slugger Field. This tree and many other beautiful decorations are for sale, all benefiting the Norton Children’s Hospital Foundation.
Buy the publication:


